Hughes H1 3D Printing and Composites
 05-31-2018, 04:03 AM
#1

Thread Starter
Join Date: Aug 2016
Posts: 104
Likes: 0
Received 0 Likes
on
0 Posts
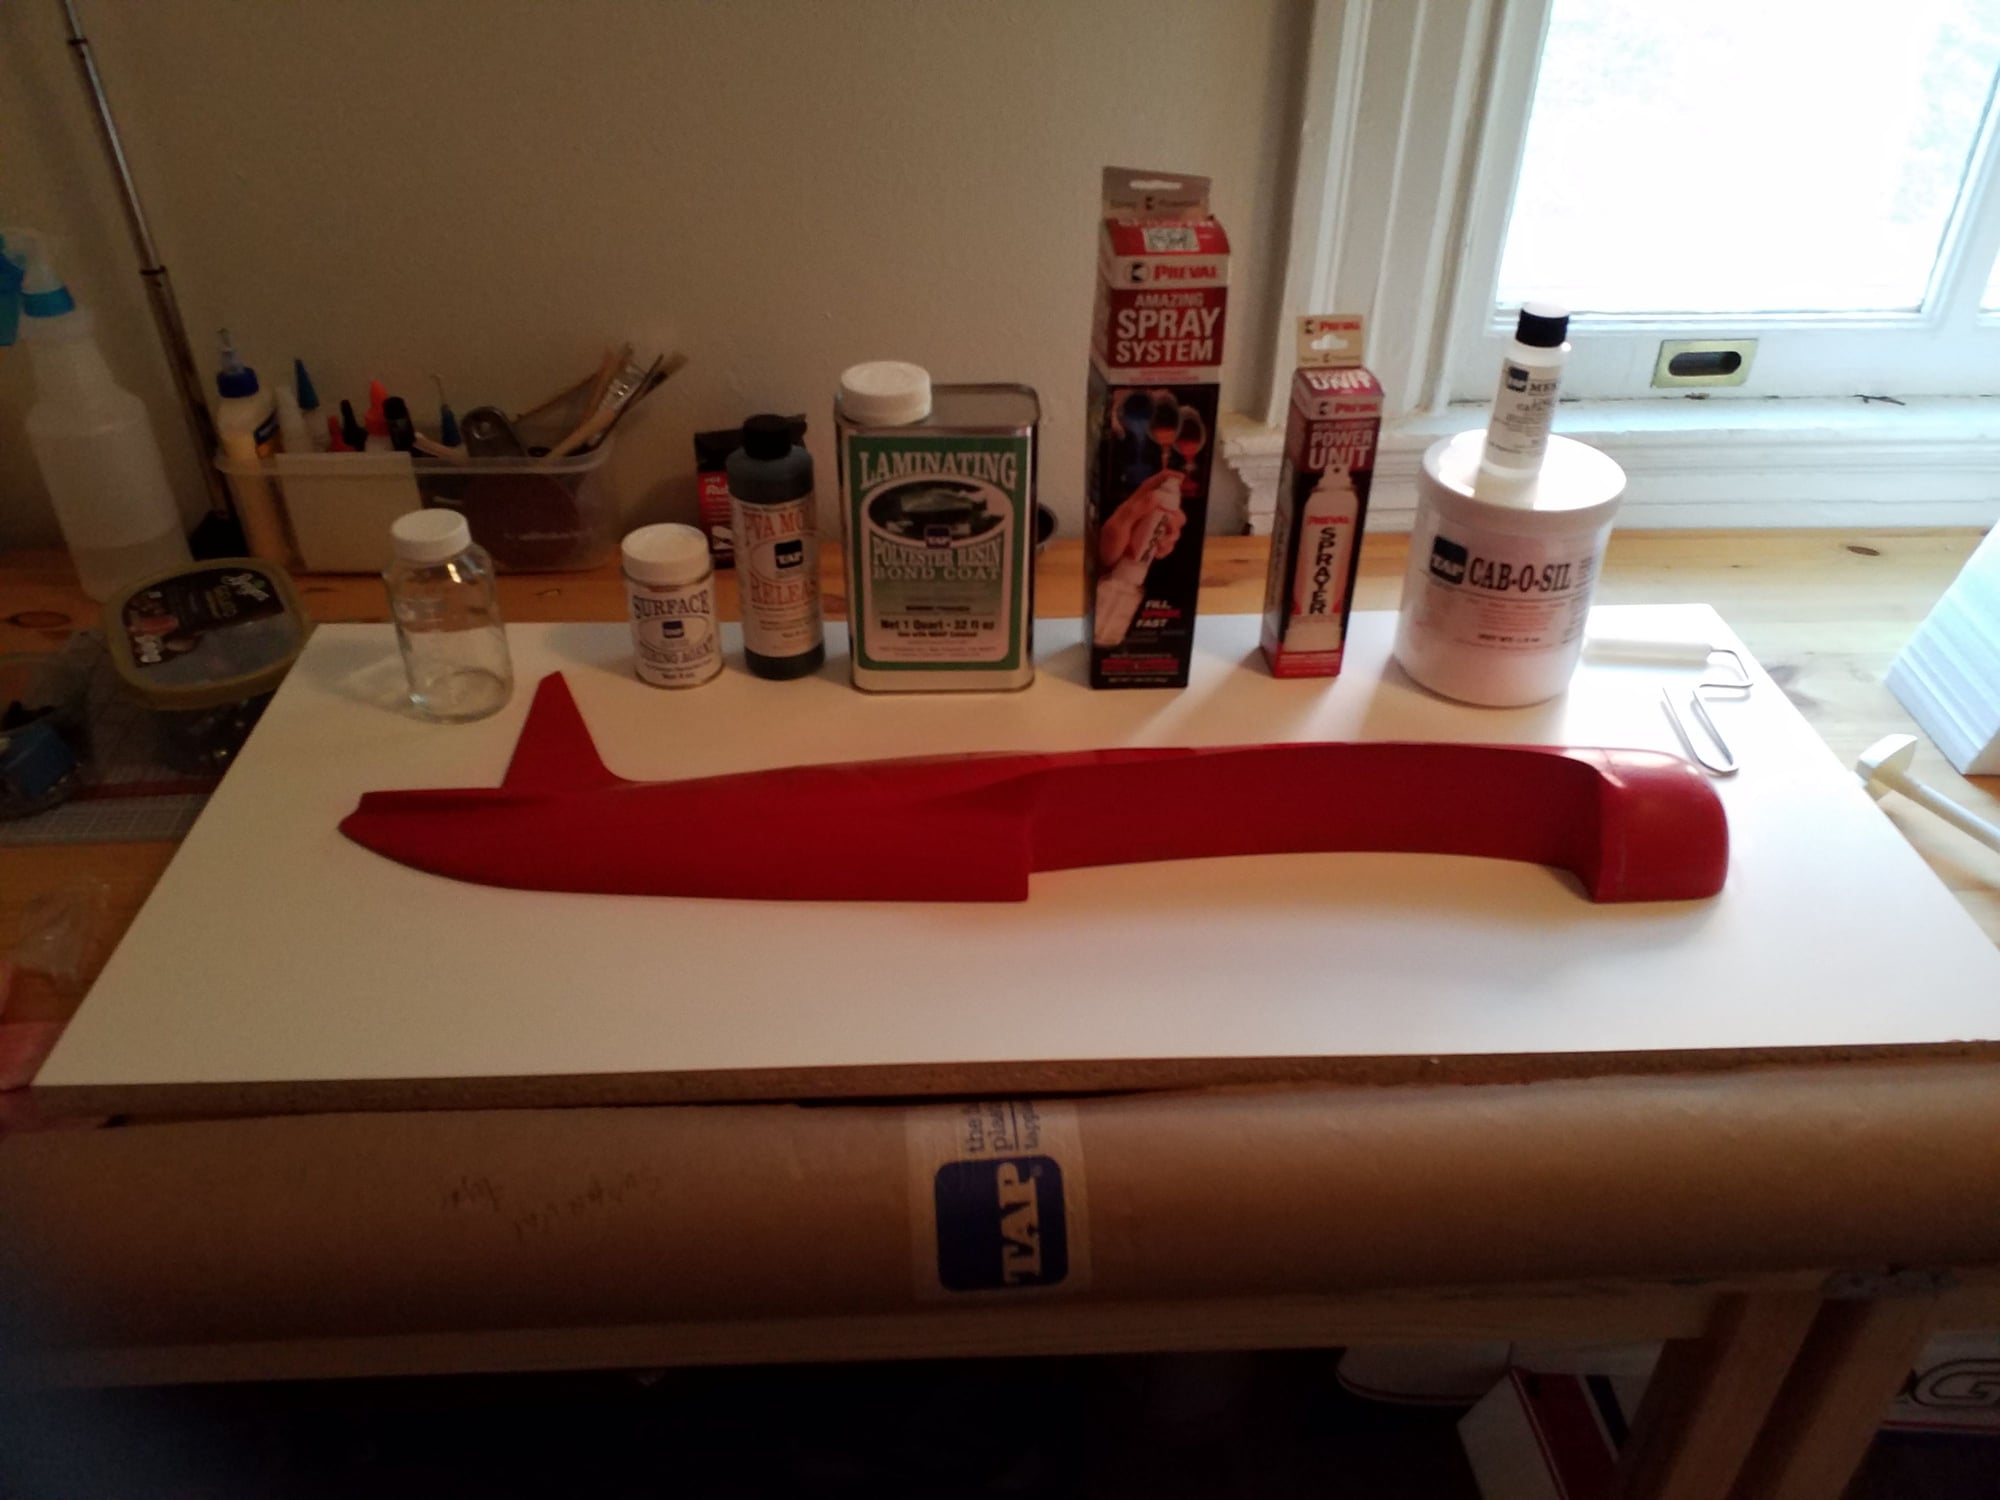
Good morning. I got a little frustrated with the kits. So, I went all in. For the last couple of months I have been working on a Hughes H1. Instead of cutting the wood for the airplane, I decided to go composite. Last airplane I did was a JU-288, which flew OK, but the cowling especially did not look the best. Now, the technology is here and as they say, we came make it faster...stronger...better.
I am using Fusion 360 as the design program. Cura as my slicer. The plans I am working off came from Aerofred, so not perfect scale, but had enough details to get this going. In the future I might work off blueprints of other airplanes if I can find them.
The last time I was working on a H1, II built the plug using pink foam and glass. My issue was getting an exact fuselage half, and accurately cutting out the dihedral. This was greatly simplified using Fusion 360 and 3d printing. Using the program I was able to build out the fuselage and then cut it exactly in half. When I get some stuff from TAP in the next week I am going to transition to the mold itself.
3D printed planes are cool, but, at the same time...you can tell they are 3d printed planes. I have found that PLA is an excellent base to work with. If you have ever sanded glass on foam you know that a little too much pressure can ruin it by going all the way through to the foam. PLA is not like that. Bondo will cure on it without warping and really sticks to it.
Instead of posting pictures, here is the first of the build series I am doing on youtube. This is not some shameless plug, the video seems to be a better medium to capture what I am doing and how I am doing it. I am not a pro youtuber, so I used cameras I had in the house.... I apologize for the quality.
Next steps are:
1. Make the molds for the fuselage.
2. Make the mold for the cowling.
3. Make the plug and mold for the belly pan.
4. Cut the wing.
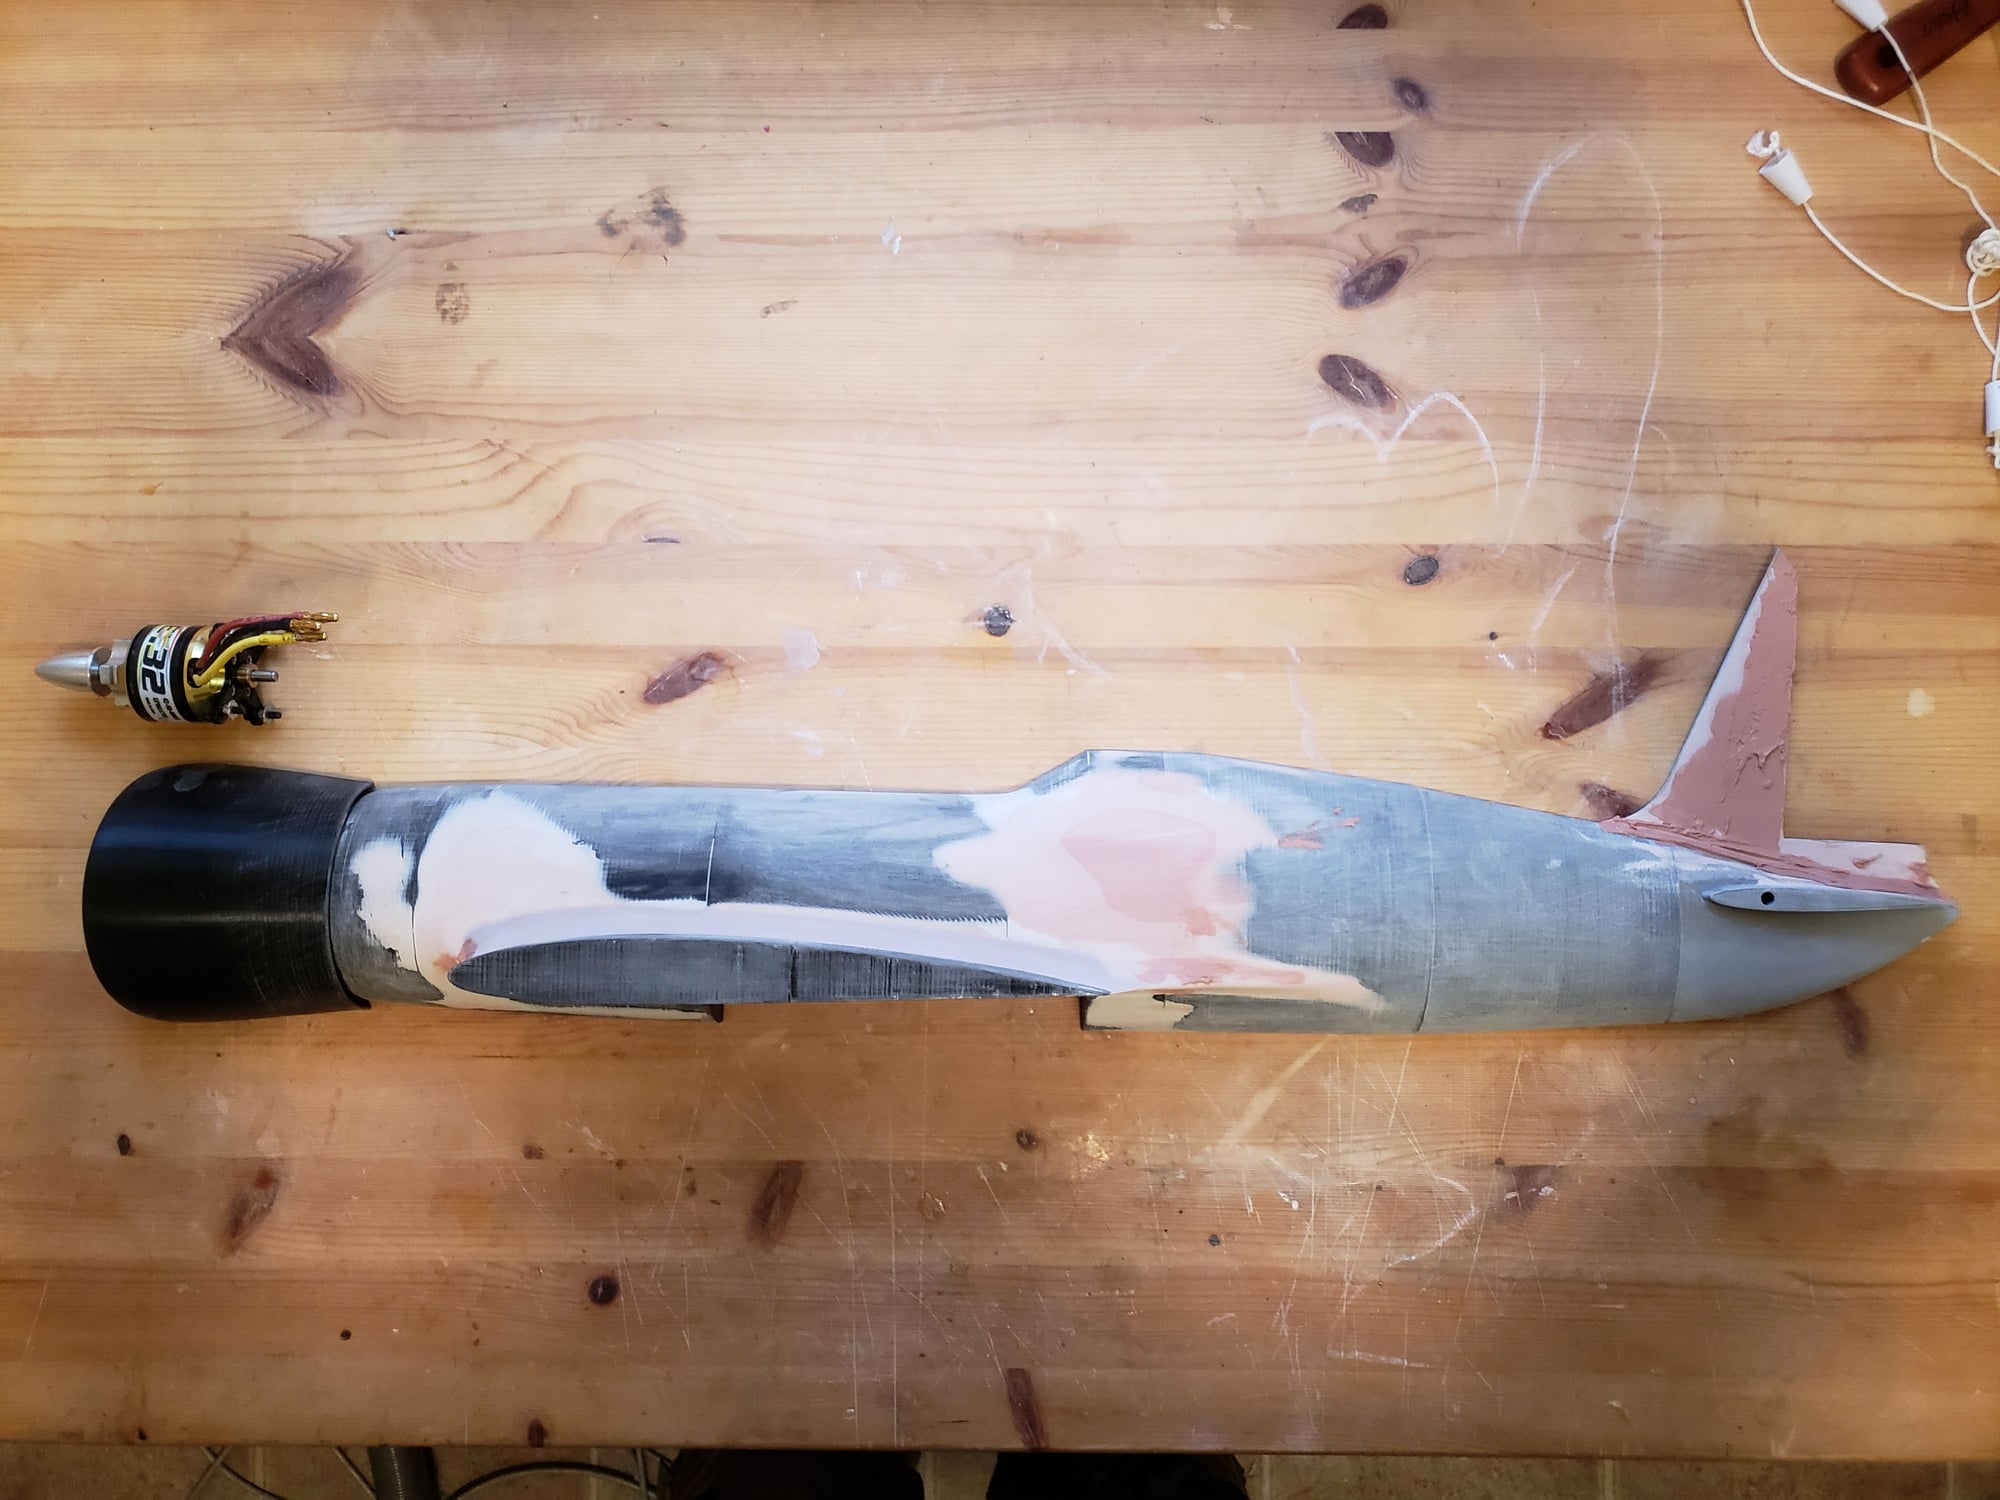
Not sure just yet what power system I am going to put into it. I reckon the biggest factor will be how heavy the aft section is. Radial engines have short moments, so I have always opted for bigger motor rather than weights.
I am using Fusion 360 as the design program. Cura as my slicer. The plans I am working off came from Aerofred, so not perfect scale, but had enough details to get this going. In the future I might work off blueprints of other airplanes if I can find them.
The last time I was working on a H1, II built the plug using pink foam and glass. My issue was getting an exact fuselage half, and accurately cutting out the dihedral. This was greatly simplified using Fusion 360 and 3d printing. Using the program I was able to build out the fuselage and then cut it exactly in half. When I get some stuff from TAP in the next week I am going to transition to the mold itself.
3D printed planes are cool, but, at the same time...you can tell they are 3d printed planes. I have found that PLA is an excellent base to work with. If you have ever sanded glass on foam you know that a little too much pressure can ruin it by going all the way through to the foam. PLA is not like that. Bondo will cure on it without warping and really sticks to it.
Instead of posting pictures, here is the first of the build series I am doing on youtube. This is not some shameless plug, the video seems to be a better medium to capture what I am doing and how I am doing it. I am not a pro youtuber, so I used cameras I had in the house.... I apologize for the quality.
Next steps are:
1. Make the molds for the fuselage.
2. Make the mold for the cowling.
3. Make the plug and mold for the belly pan.
4. Cut the wing.
Not sure just yet what power system I am going to put into it. I reckon the biggest factor will be how heavy the aft section is. Radial engines have short moments, so I have always opted for bigger motor rather than weights.
 06-01-2018, 08:53 AM
#2
Thread Starter
Join Date: Aug 2016
Posts: 104
Likes: 0
Received 0 Likes
on
0 Posts
Just thought about it. If you have fusion 360 and want to see the modeling or print your own, PM me and I will add you to the fileshare. Could used feedback too if. This has been a fun project.
06-01-2018, 05:10 PM
#3
Thread Starter
Join Date: Aug 2016
Posts: 104
Likes: 0
Received 0 Likes
on
0 Posts
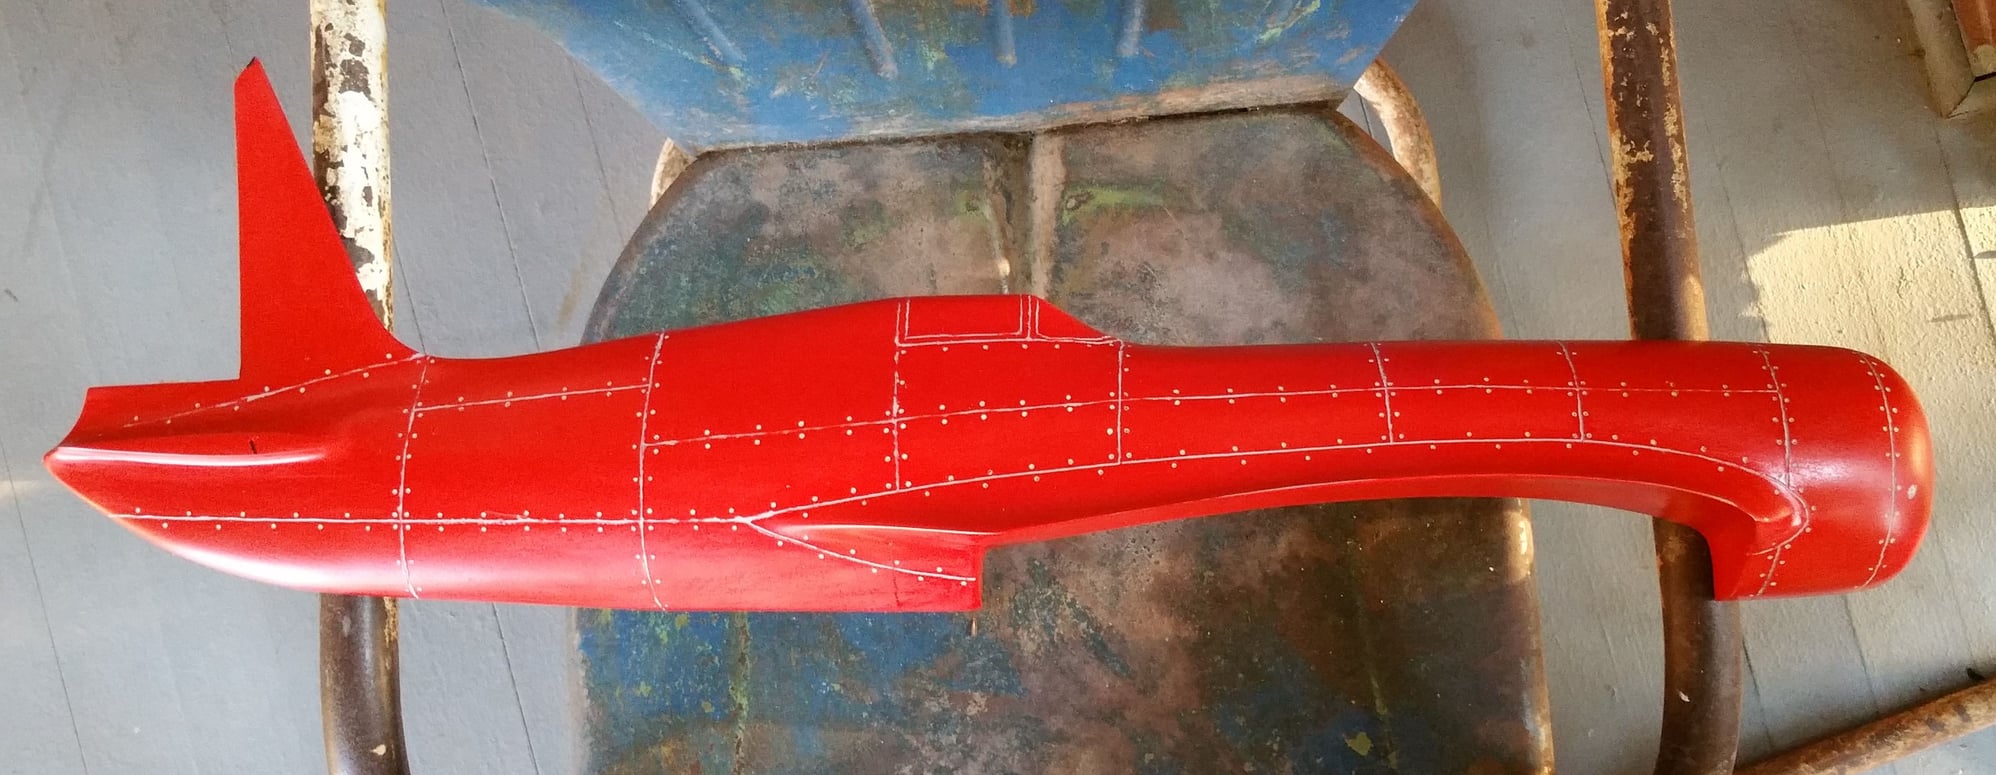
I have never tried making panel lines before on a plug. This plane has tons....tons of rivets, so I just etched these in for some show. If this works...having never done this before...I might make a go of getting the lines a bit more precise. More of an exercise in something new.
06-02-2018, 08:14 AM
#4

As a CAD newbie I'm looking forward to seeing more of this. Is this plug assembled as you discussed, from printed sections?
06-02-2018, 01:39 PM
#5
Thread Starter
Join Date: Aug 2016
Posts: 104
Likes: 0
Received 0 Likes
on
0 Posts
The tail I design, lofted to 2mm and printed two copies, one for the left side, the other for the right. I cut a channel in the fuse in the CAD and the section printed with that channel, so the tail slid right in. If you are using Fusion (free), email me your email you want to use and you can view the files. I am getting the hang of the basics. Next project on the books is a Fiat CR-32.
 06-03-2018, 08:10 AM
#6
Dang, that's spiffy. The process might get a little tedious for something really big but it is a creative way to get something that is much bigger than your printer's work surface. I've been learning A9cad and can do formers and simple wing layouts but I can already see that 3-D offers a lot of advantages. I've seen mention of Fusion 360 being free for non-commercial users. Is that correct? If so, where did you get your copy? I am curious about the files and have sent yo a PM.
06-04-2018, 04:45 AM
#7
Thread Starter
Join Date: Aug 2016
Posts: 104
Likes: 0
Received 0 Likes
on
0 Posts
When I get home I will add you to the file share. Yep it is free.
The biggest upside to making a plug this way is the durability of the PLA as a subsurface and the ability to repeat parts with the same precision. The downside is the time to print. Each section was roughly 8 hours, and if you do it over night and while at work.... done before you know it.
I am still a rank amateur with fusion 360, but their interface is great and the wing airfoil plug in is very easy to use, once you understand how fusion sees the universe.
If anyone out there knows how to fillet a fuselage in fusion please let me know.
 06-05-2018, 05:08 PM
#9
Thread Starter
Join Date: Aug 2016
Posts: 104
Likes: 0
Received 0 Likes
on
0 Posts
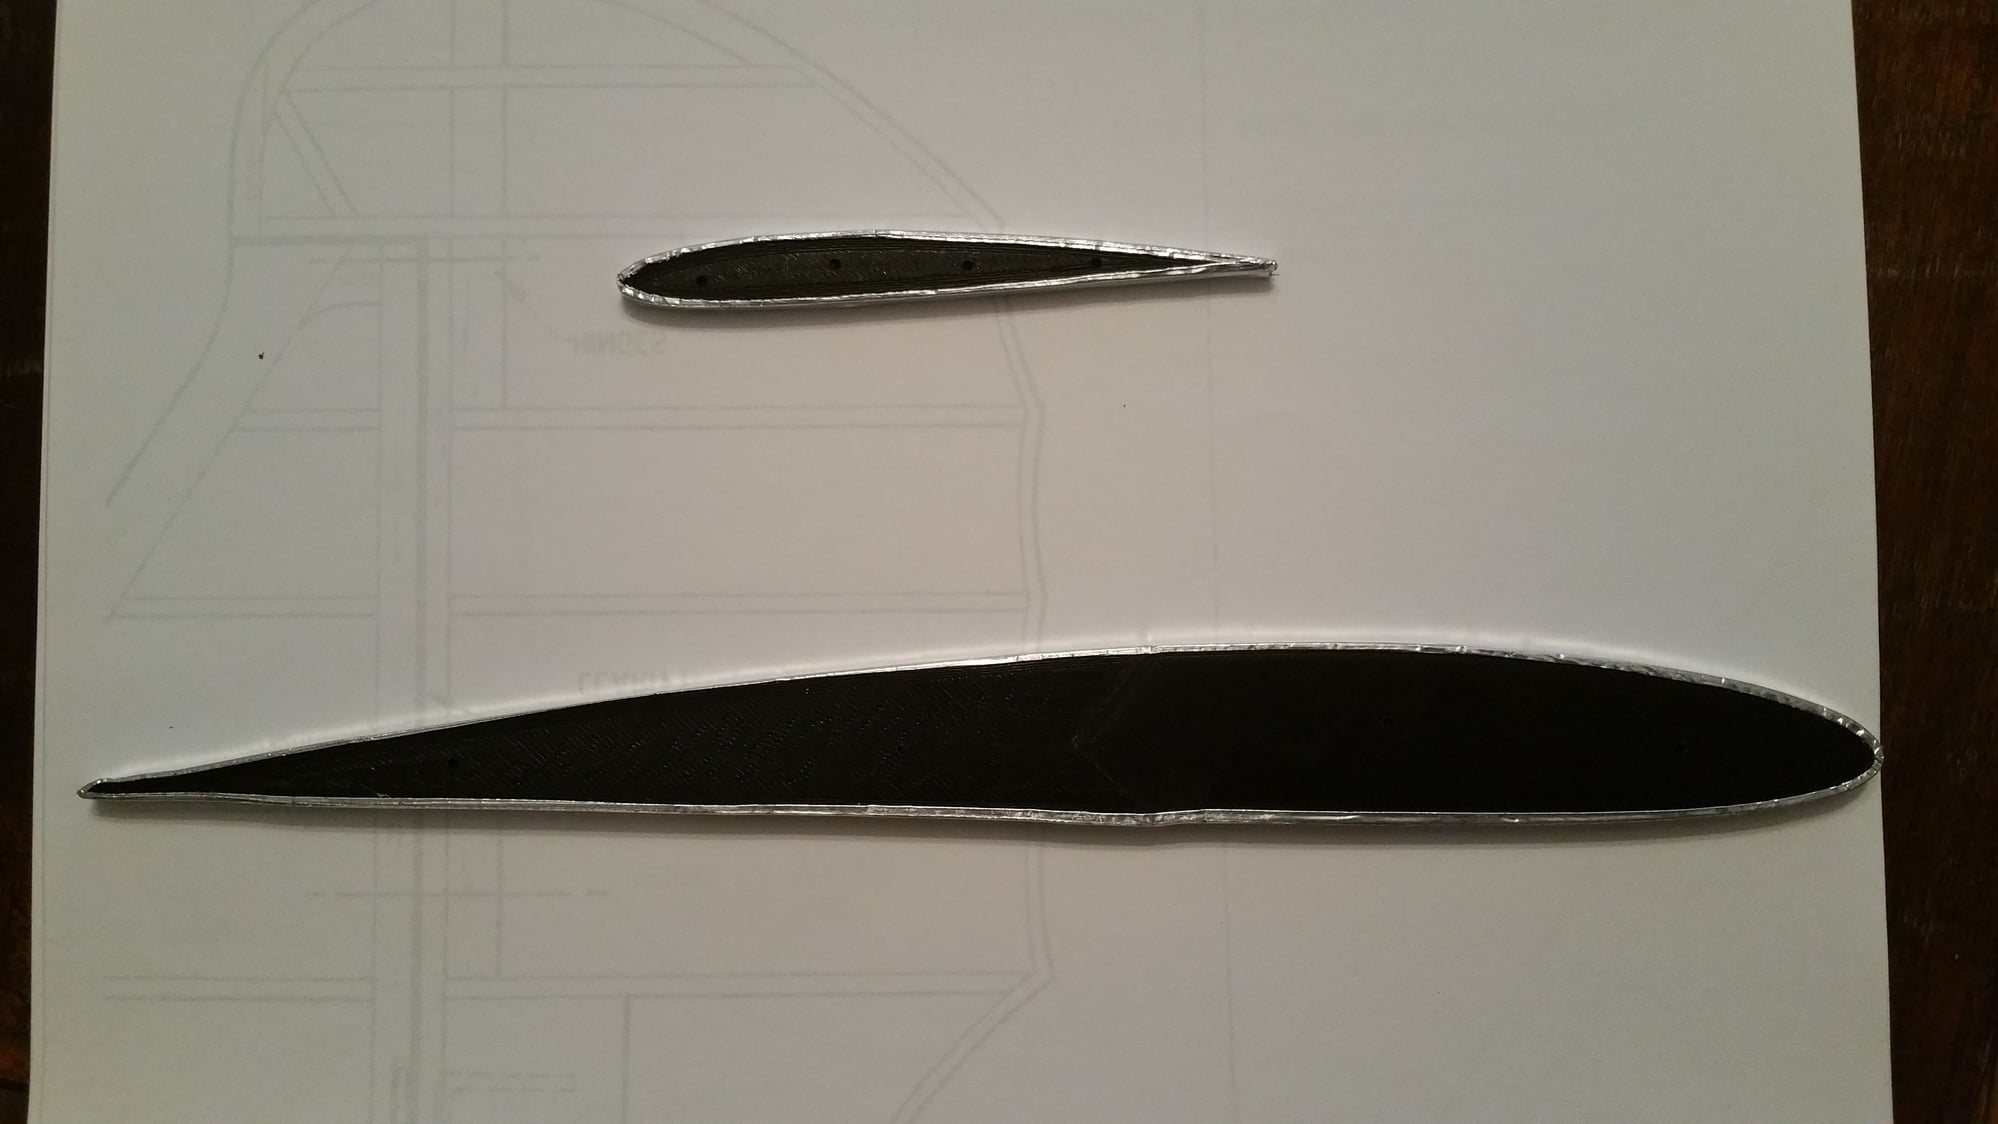
I just messed around with this and surprisingly it worked. 3D printed airfoil template then two wraps of aluminium tape. PLA did not melt and the wire glided nicely. And...since it has been so long since I cut wings, I forgot to add the extensions. So, back to fusion and some more 3d printing....
 06-08-2018, 04:03 AM
#11
Thread Starter
Join Date: Aug 2016
Posts: 104
Likes: 0
Received 0 Likes
on
0 Posts
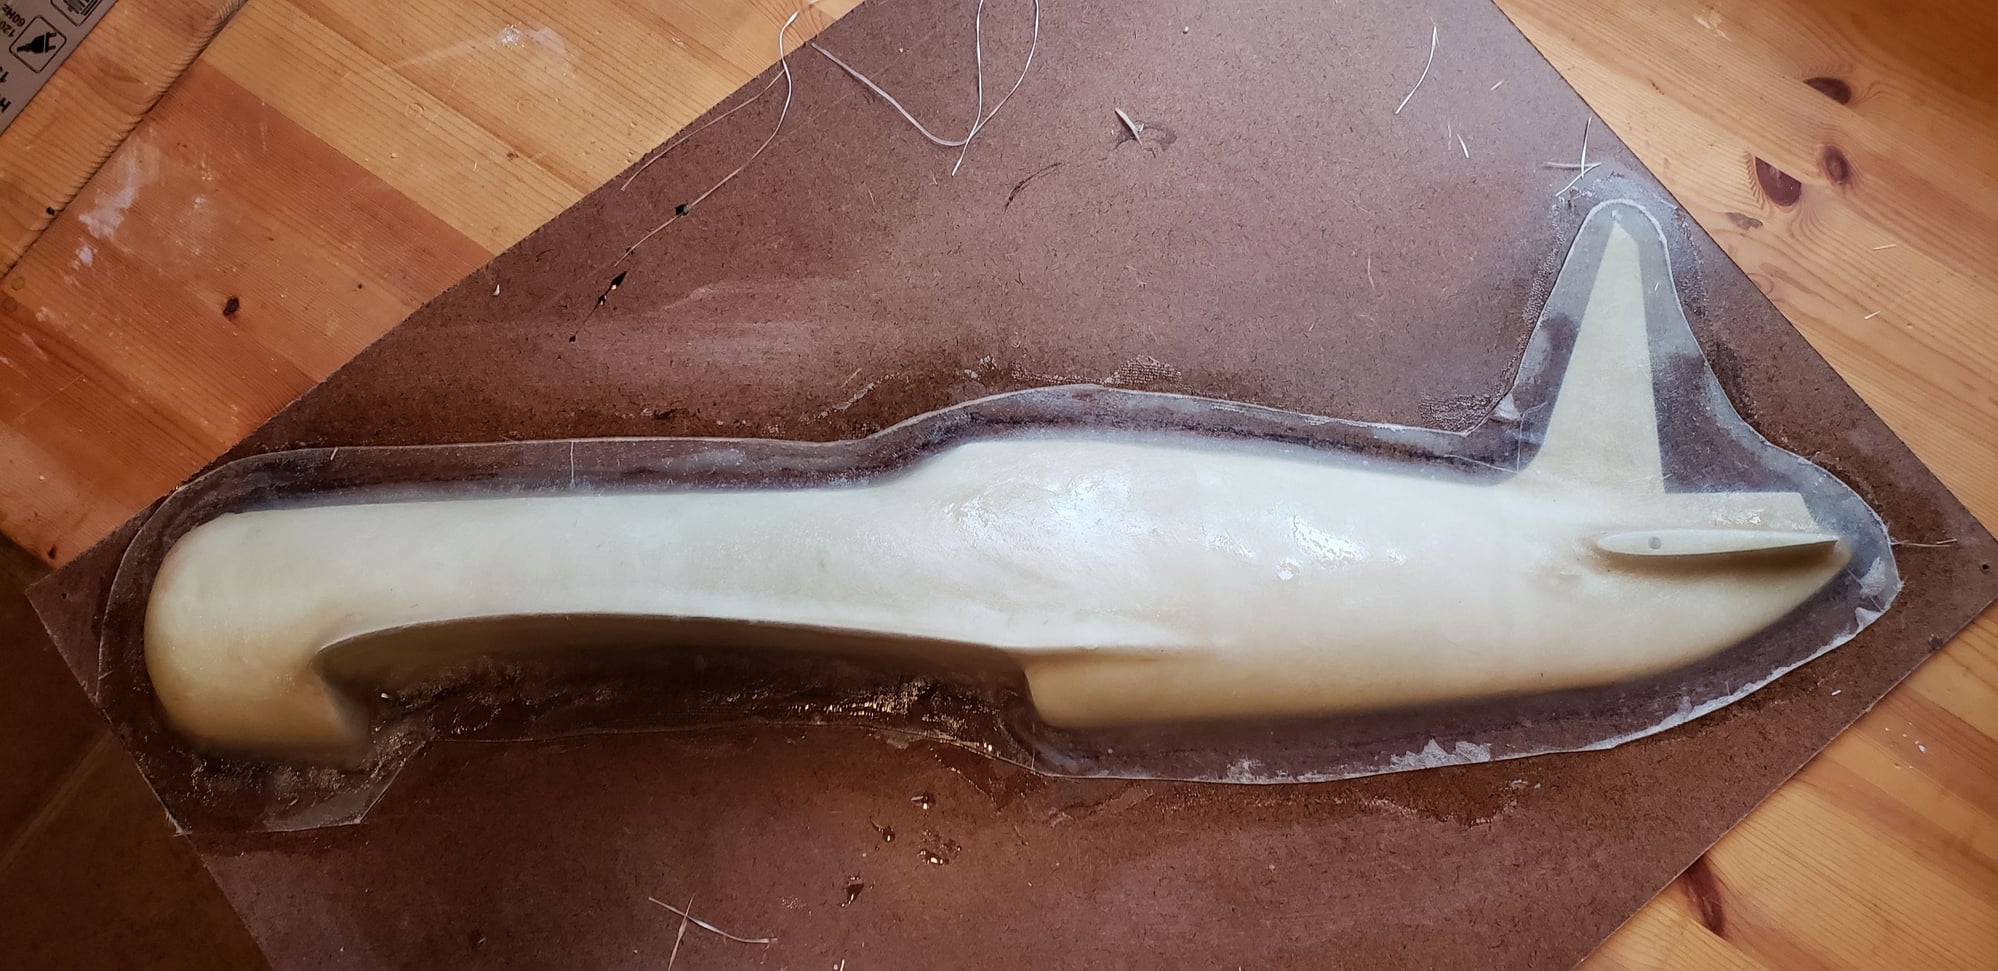
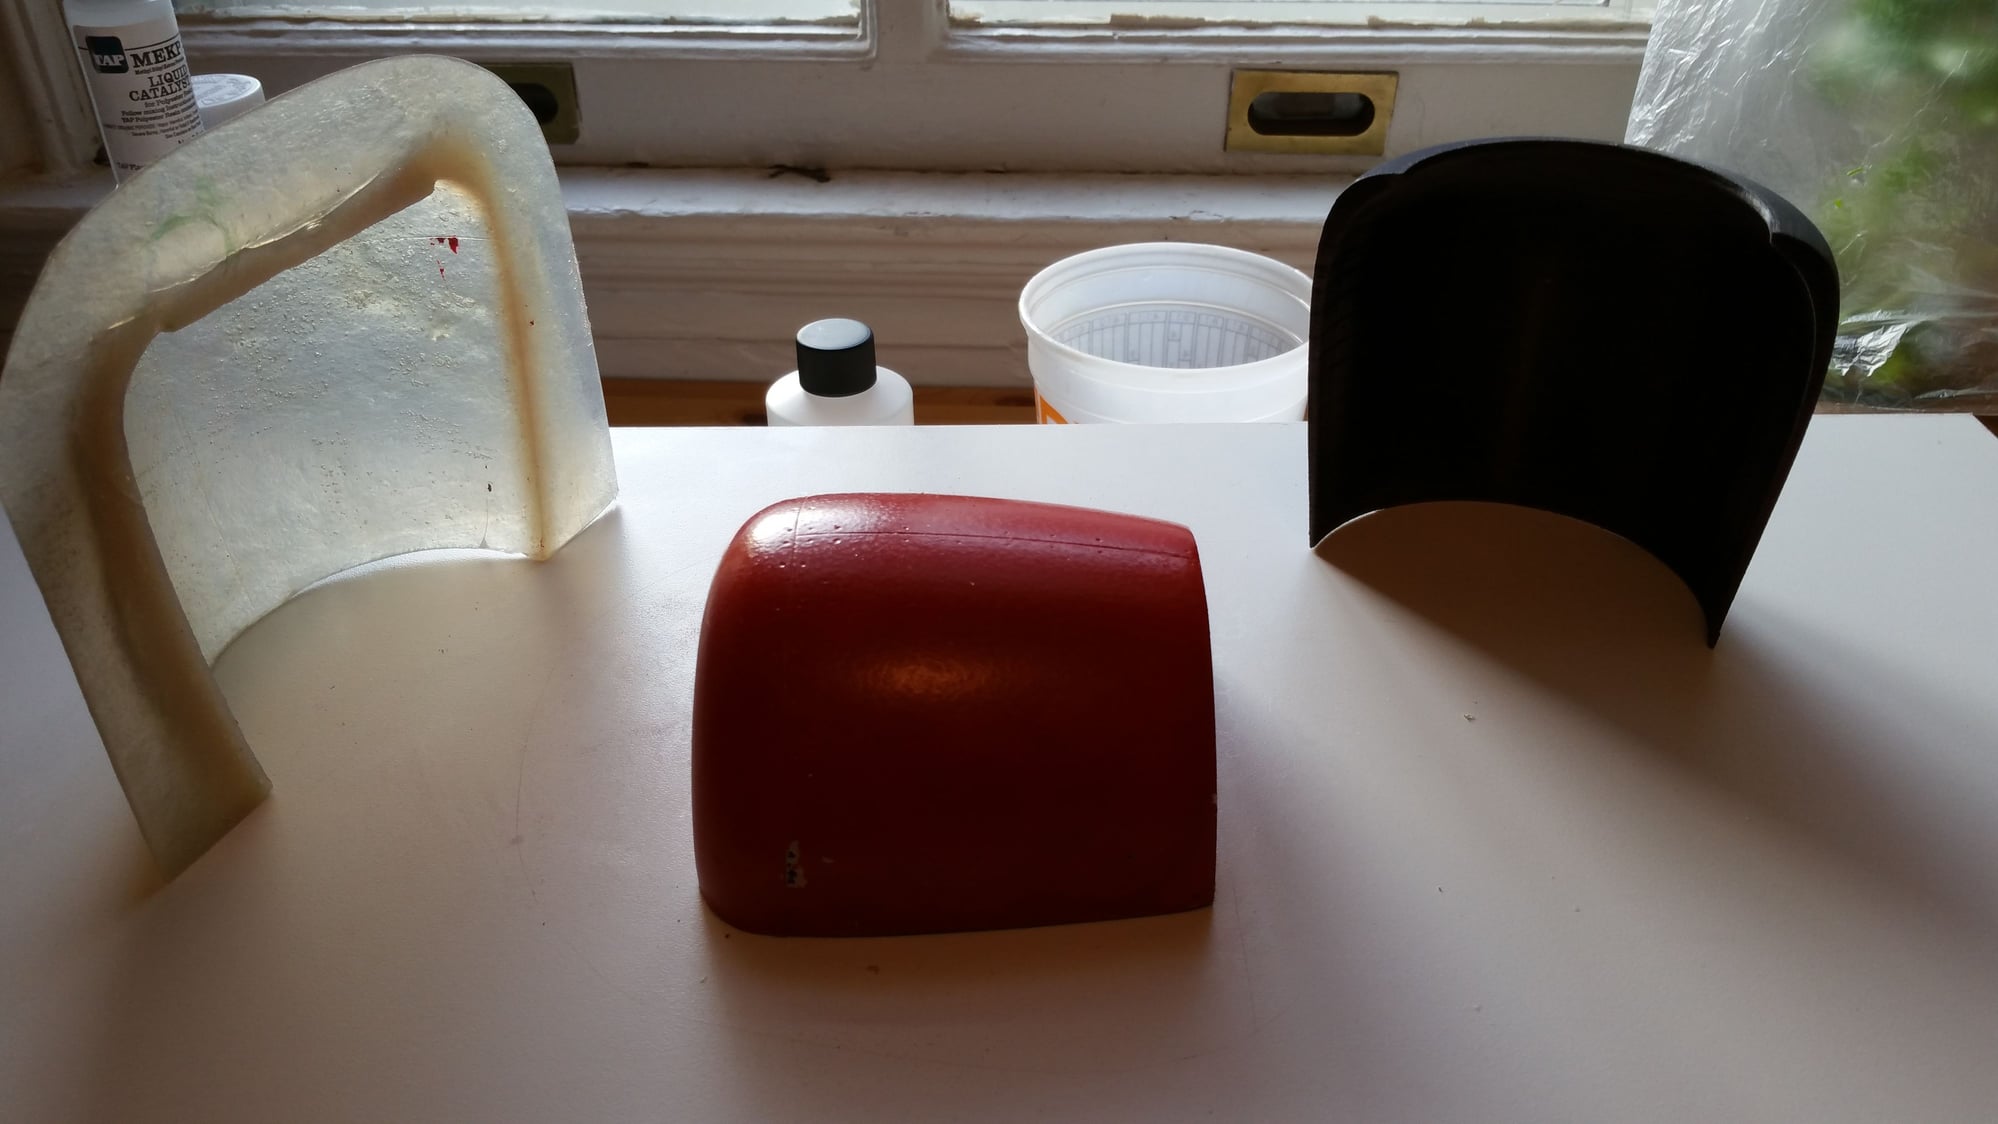
Last night I made my first mold ever. To be honest, it seemed a bit intimidating. I was really worried about the epoxy sticking to my board and plug. I followed the instructions, just like the TAP Plastics video shows (excluding the gelcoat) and came up with this. On the left is the mold, center plug, and right a cowl half I 3D printed. Now it will be a contest to see who is lighter and stiffer. The 3D print actually has an airfoil shape on the inside of the cowl to promote airflow and reduce drag. The fiberglass cowl will be flat. Here is what I learned.
1. PLA is the way to go. When doing bondo or glass work on top of foam, the foam is just too sensitive to heat. I left my roller, after cleaning, on top of a piece of 1LB foam. There was enough heat still in the roller and the bit of thinned epoxy on it to melt the foam. Using a PLA plug allows me to use Polyester epoxy resins, which are so much cheaper then the other types of epoxy. In fact, the TAP Plastics epoxy looks, smells, and activates just like the Bondo epoxy which is 6 dollar a quart cheaper.
2. You need more epoxy then you think. I have never mixed up 5 ounces of epoxy before. You need epoxy for the filler material, the layers of mat, and the surface curing agent. Seems to not sound like a lot, 5 ounces, but when you are used to mixing epoxy in dixie cups and thinning with alcohol for small glass covered models... well, 5 ounces is a gallon or two.
3. The paint job on top of the PLA is everything. I used rustolueum thick primer, and plastic compatible gloss red. I ould see where the paint pulled off the mold that it had not bonded correctly to the PLA, which, given where it pulled up, was a function of my not roughing up the PLA or getting bondo there. The PLA will release a lot of things if you do not get the right amount of friction, either through a porous medium like bondo, or roughing up the exterior. I would not say this mold is a no go, but if I do make another, I will pay more attention to the prep work and the paint drying cycles. Thankfully this will not be an issue with the fuselage because of the amount of sanding I did to it.
4. Melamine is awesome. It is so slick, the mold popped right off and the surface looks like I could use it again. (Used plastic wedges)
Nearly forgot, the picture does not do it justice, on the inside I can see all of my panel lines and rivets. Next step is to mount the mold and laying in glass to make a cowl half. This is where I will see if skipping on the gelcoat will make a difference. It was a cost thing and a weight thing. I reckoned I don't need gelcoat on the fuse, especially if I am painting it anyway. Also, the cost of the gelcoat, cup gun, and mil gauge was nearly 75 buck by itself...and I do not have an air compressor.
Last edited by dirtdart; 06-08-2018 at 04:06 AM.
06-08-2018, 10:02 AM
#12
Thanks for the link. I haven't had an opportunity to follow up due to not having access to my personal computer. I've followed composite building threads from experts but it's also interesting to follow someone who is new to the task. I've made a few small items but I'm looking to make my first large cowl later this summer.
06-10-2018, 04:41 AM
#13
Thread Starter
Join Date: Aug 2016
Posts: 104
Likes: 0
Received 0 Likes
on
0 Posts
Wow...total disaster. Too ashamed to show the pics...lol. Here is what I learned.
1. I went outside (wife was not a fan of the polyester epoxy) and forgot a cardinal rule about working with epoxy outside. Chill your resin if it is in a large batch. I am from New Mexico and know better. My first batch of resin hardened before I even got the first mat layer down. The Cab-o-Sil flanges and border taping were done, that took 10 minutes or so. I expected to have 20 minutes, as I had inside. 10 degrees can make all of the difference in the world.
2. I am going to use gelcoat next time. I think it also acts as a good insulating layer between the epoxy and the plug. When I went to remove the plug, the bondo separated from the PLA. I attribute this to the temperature of the epoxy curing "sliming" up the PLA and changing the bond between those two mediums.
3. The "preval" sprayer for the PVA works once. When I used it the second time it was gummed up, despite the fact I had not removed the intake straw from the PVA jar. Next time, I will run alcohol after an application through the sprayer to keep the feed clean.
4. I also think I am going to use two part automotive paints. So, will need a small compressor. They are a bit harder to use in terms of easy, but cure much much harder and will actually allow me to use tape to mask panel lines as opposed to me scratching them in with an awl.
Biggest thing is, I tried to do this on the cheap by avoiding some of the steps. Ended up setting me back 40 bucks or so and literally a month of printing and sanding. But like anything in this hobby, you can chalk it up to experience. No one in these forums has been through less then 5-10 planes in their lives...especially if you are like me and learned to fly pre-buddy box (orange futaba)...lol. Time to dig back into the forums and read some more on glassing, I thought I had it figured out, guess not. More to follow for sure.
06-10-2018, 08:00 AM
#14
Air compressors are one of those things that once you get one you wonder how you lived without it. A small pancake compressor can be stored in a closet and if you use it to air up the occasional tire and your hobby work even a cheap HF unit will last a long time. For my purposes the smaller touch up or detail spray guns work well and can be had for a reasonable price.As for two part paints I have used Nason brand (I'm told that it is DuPont's budget brand) with good luck on both cars and airplanes. I get mine at O'rielly's but you may have a cheaper source in your neighborhood. Be forewarned, the neighbors will smell it. I'm not sure how practical it is for you but I have used an ice bath to keep a container of resin cool.
07-18-2018, 07:14 PM
#16
Hang in there.

 10-12-2018, 08:27 AM
#21
I think the saying is "Too much power is just about enough".
10-12-2018, 09:13 AM
#22
Thread Starter
Join Date: Aug 2016
Posts: 104
Likes: 0
Received 0 Likes
on
0 Posts
If you are as old in this hobby as me, we were flying SIG kadet seniors with a KB .40, Perry carb, at 8k field altitude. Talk about underpowered. Never again. My .46 size edge has a saito .82. The 1.20 sized Pitts I am trying to score will get a saito 1.80.
The only time I have had too much power is when I had a lehrner motor on a small composite glider. The ailerons would flutter in level flight at full power. The climb however..... check my you tube channel lol.
The only time I have had too much power is when I had a lehrner motor on a small composite glider. The ailerons would flutter in level flight at full power. The climb however..... check my you tube channel lol.
Last edited by dirtdart; 10-12-2018 at 01:43 PM.
10-13-2018, 06:17 AM
#23
Thread Starter
Join Date: Aug 2016
Posts: 104
Likes: 0
Received 0 Likes
on
0 Posts
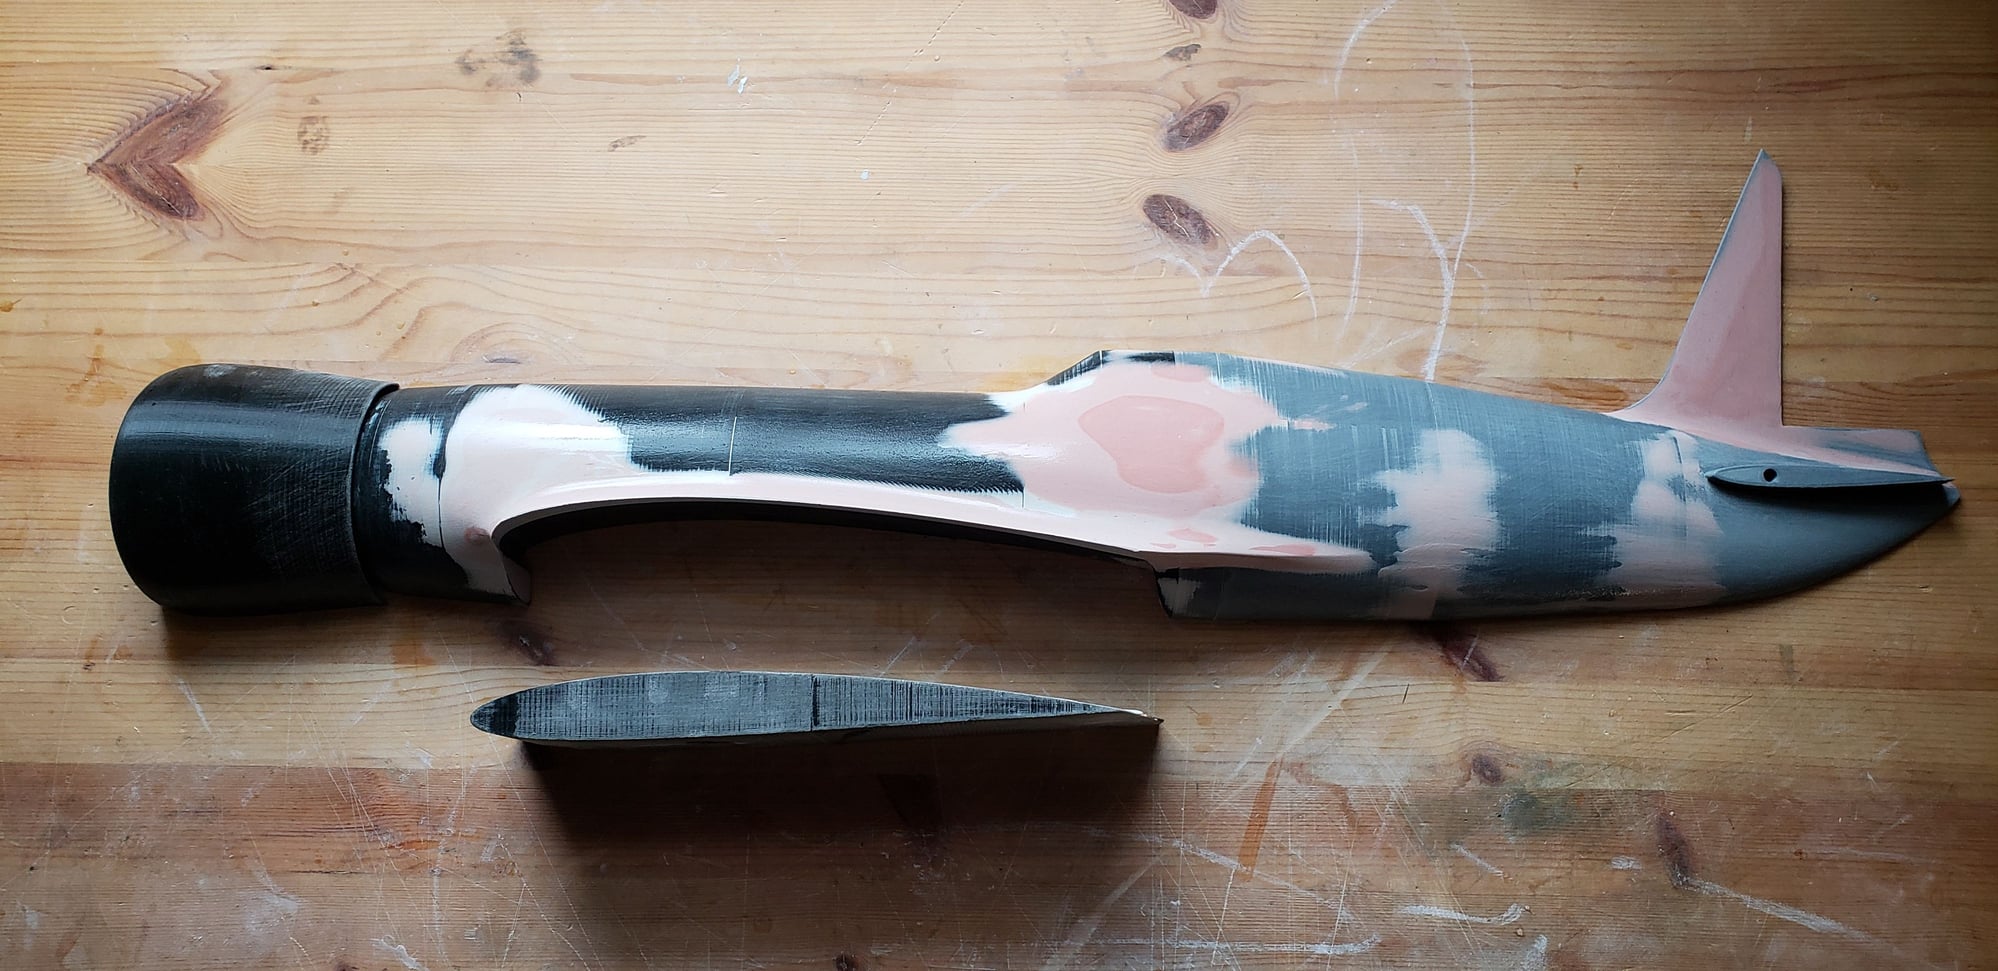
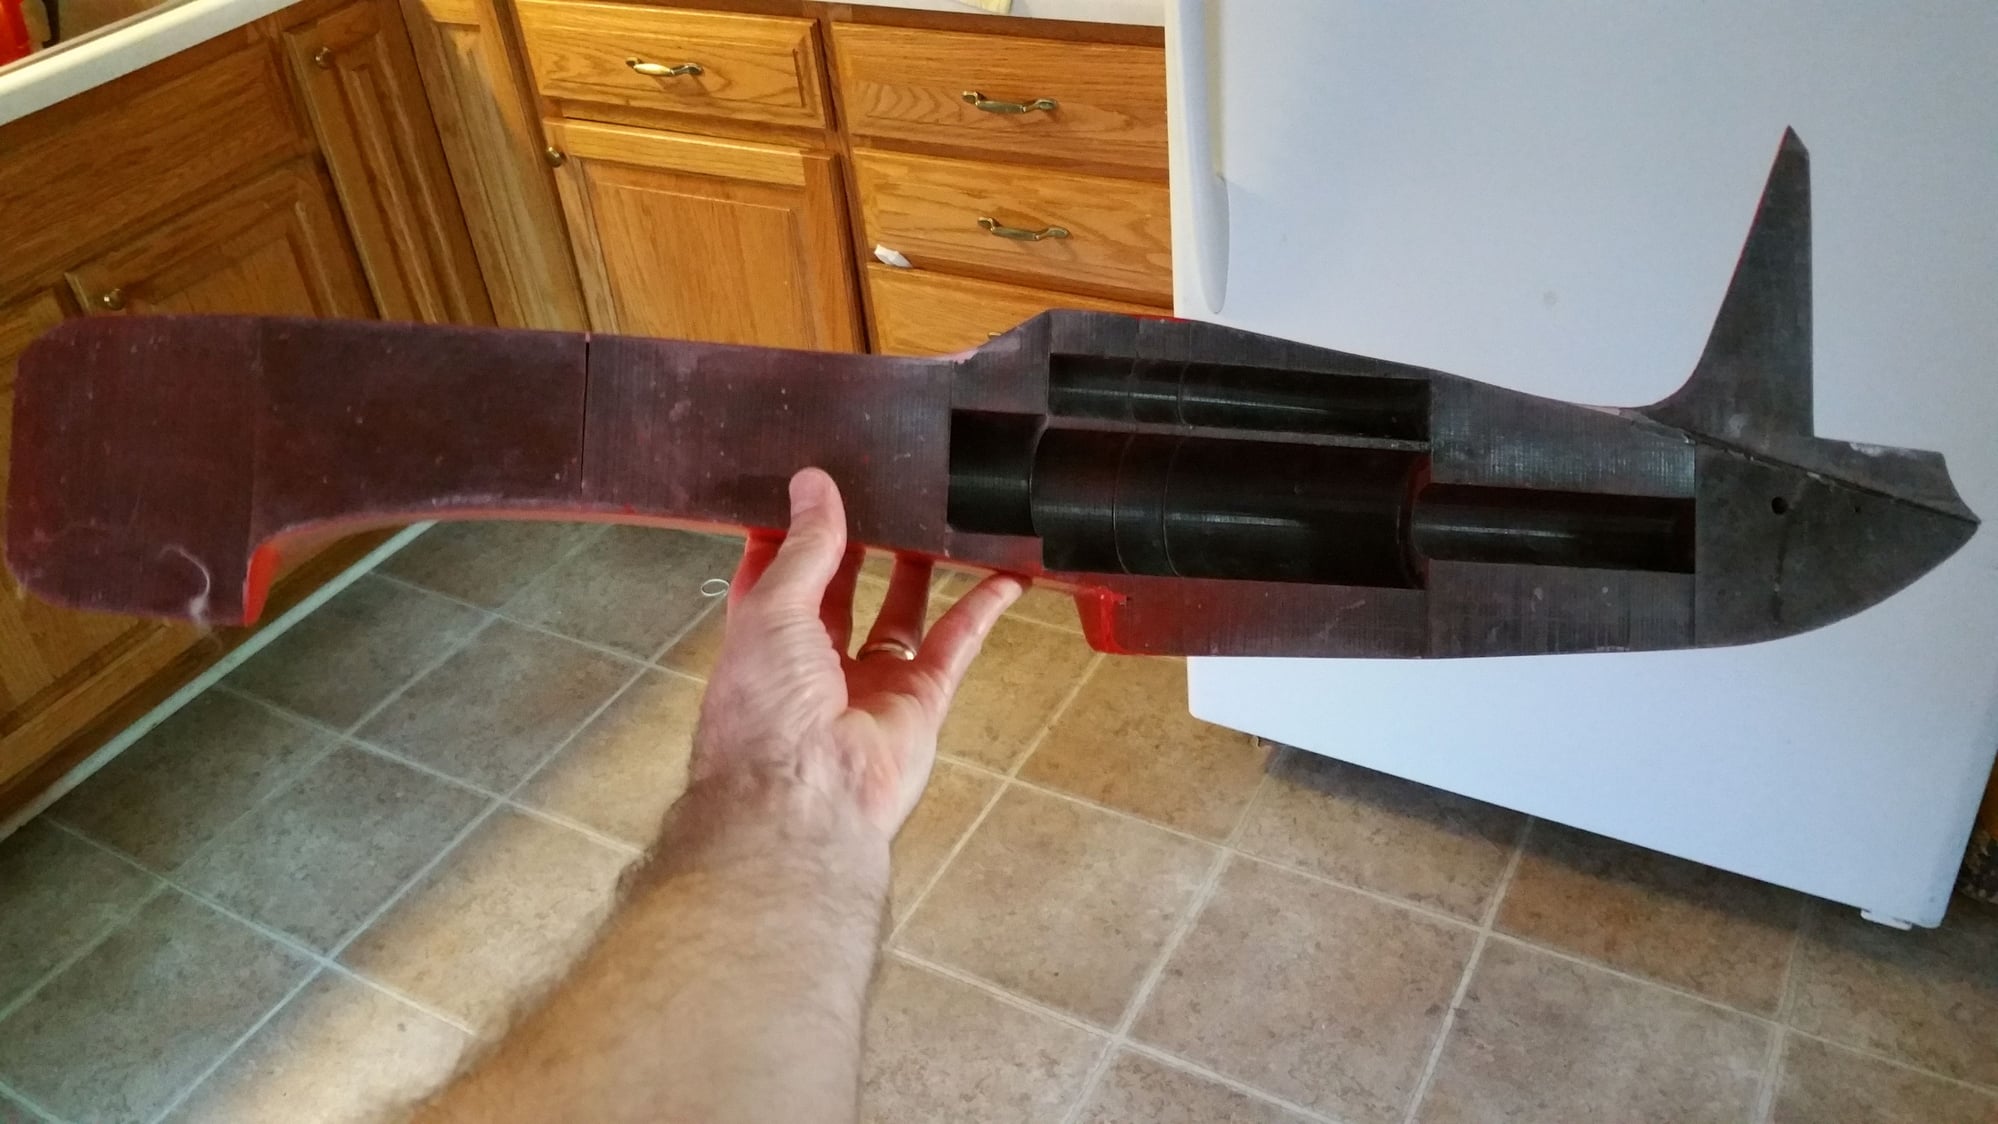
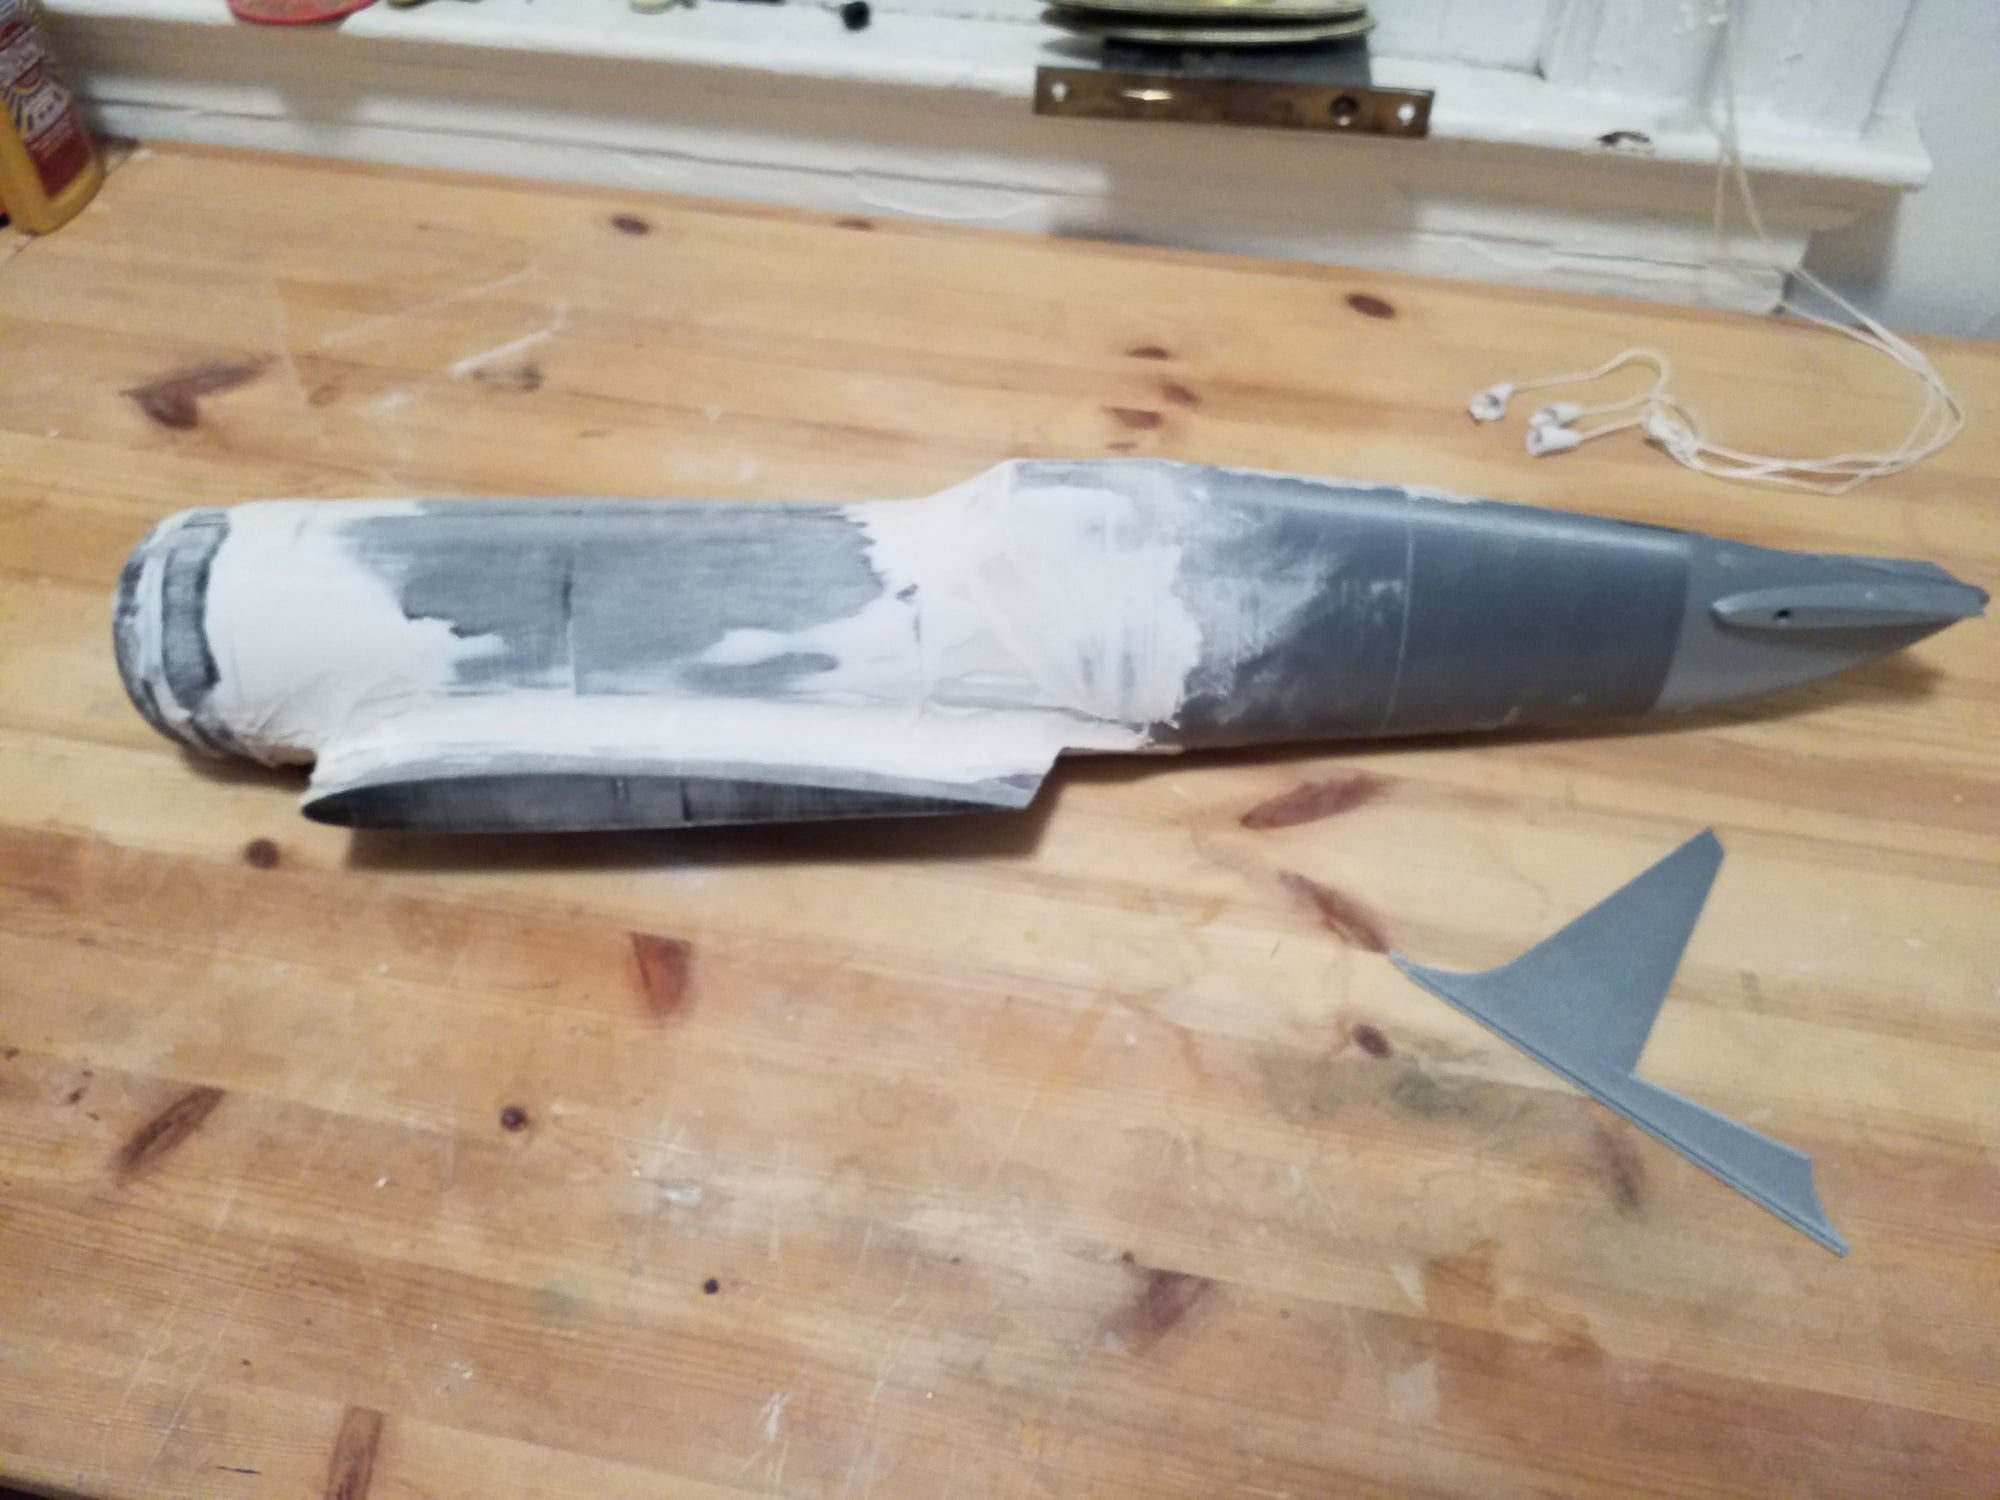
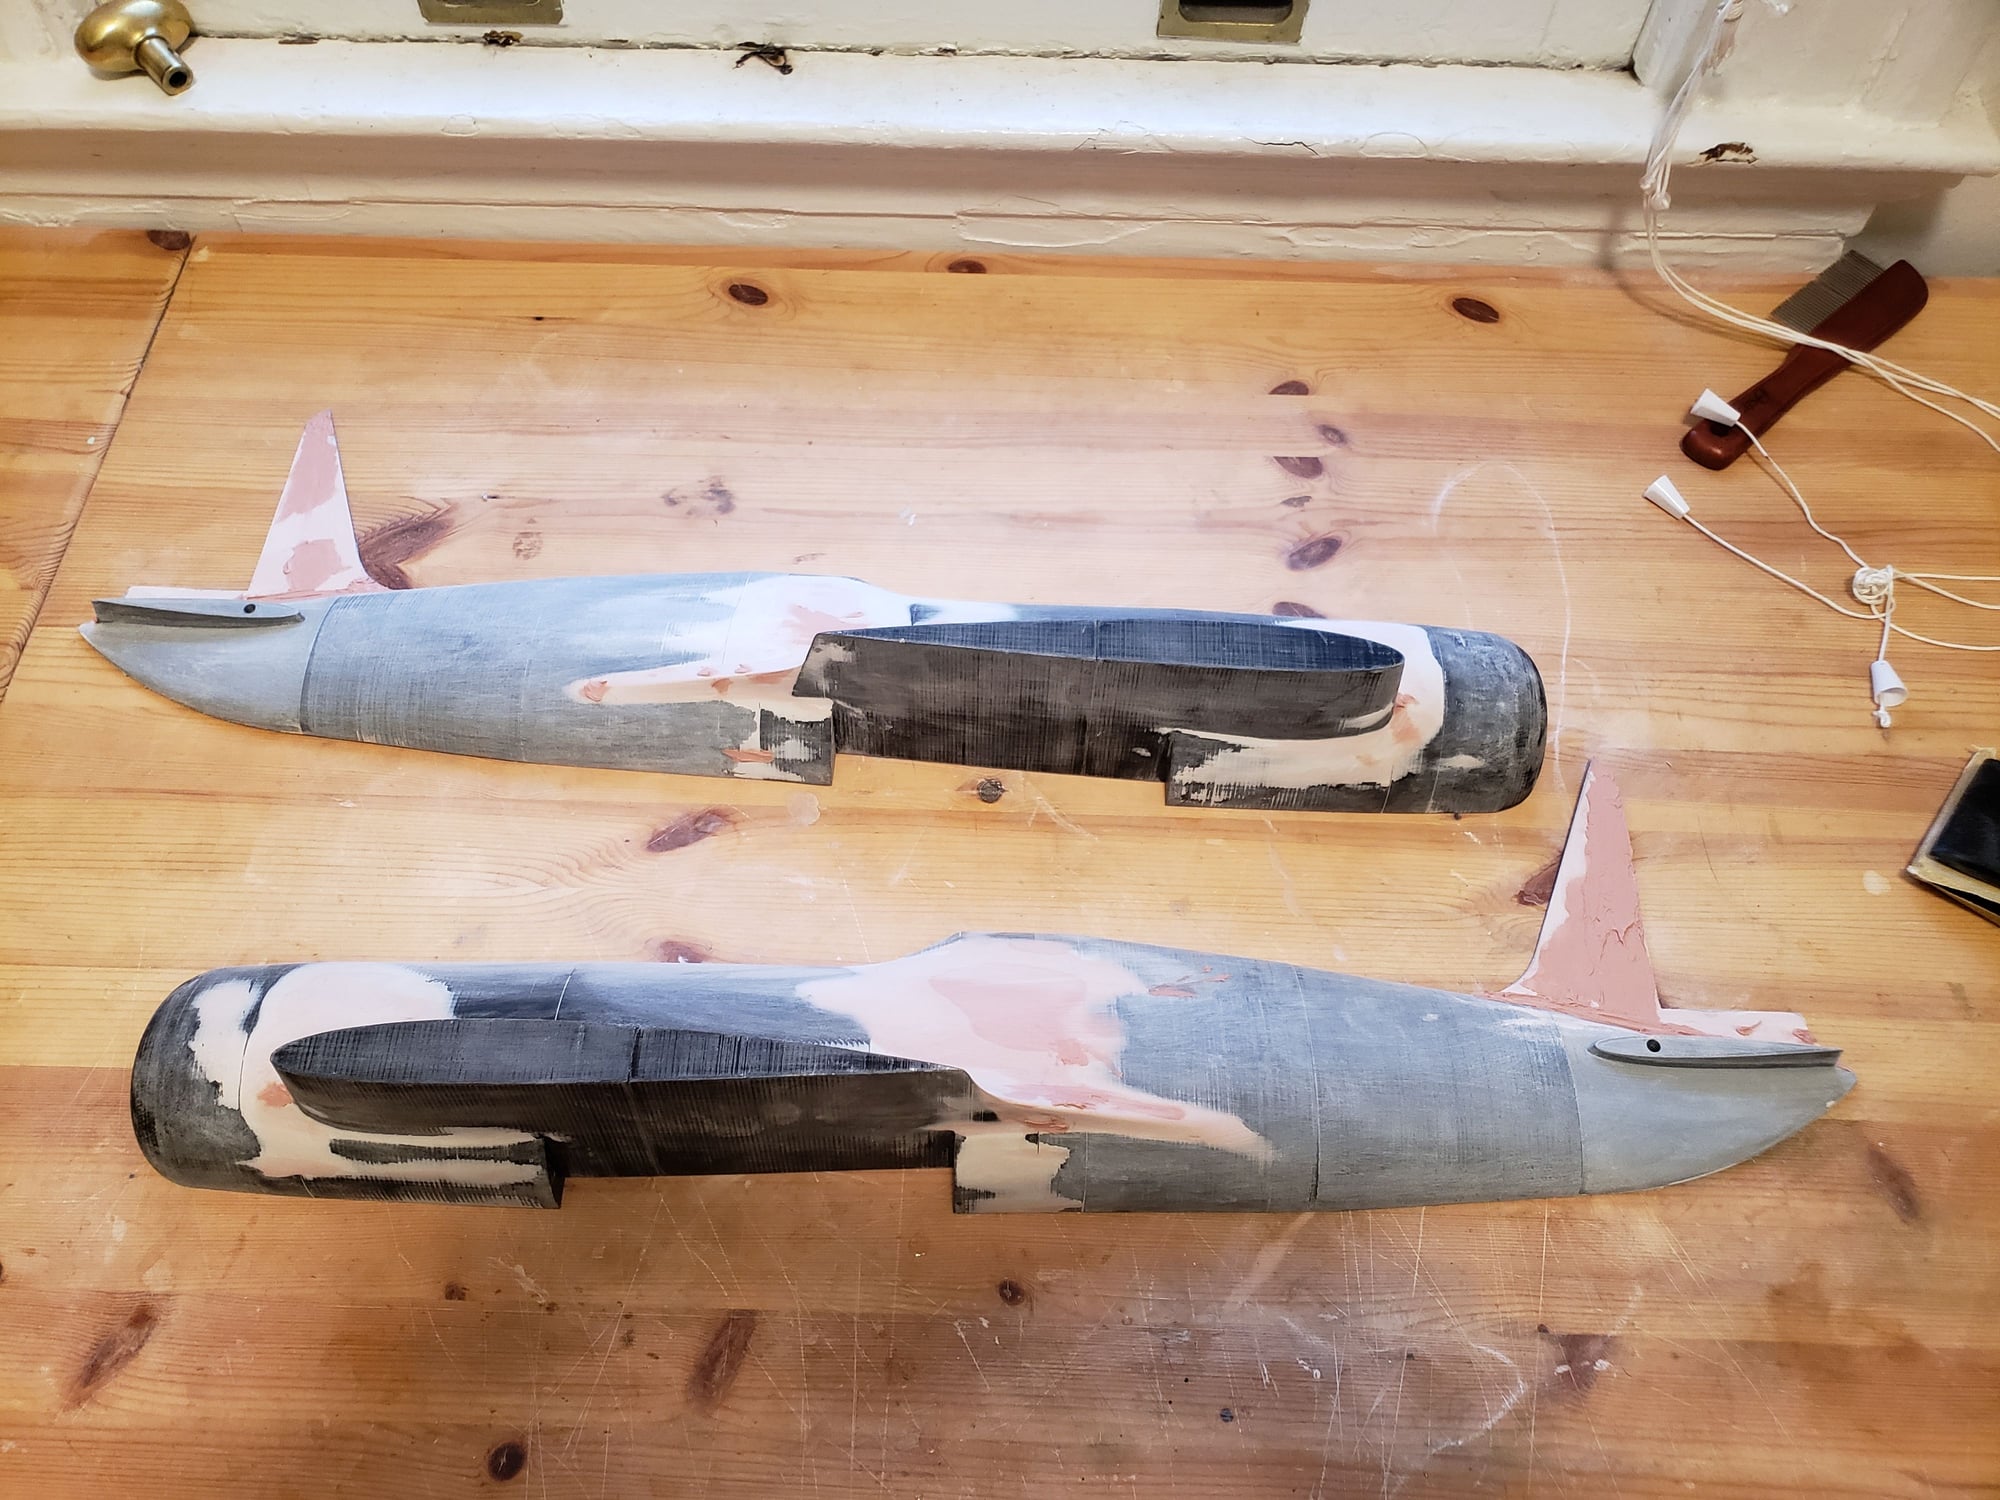
Wing and belly pan separated from fuselage. Always makes me nervous doing this, but not to worry. The pla holds the bondo great for sanding, but does not hold well under certain circumstances.
10-13-2018, 06:20 AM
#24
Thread Starter
Join Date: Aug 2016
Posts: 104
Likes: 0
Received 0 Likes
on
0 Posts
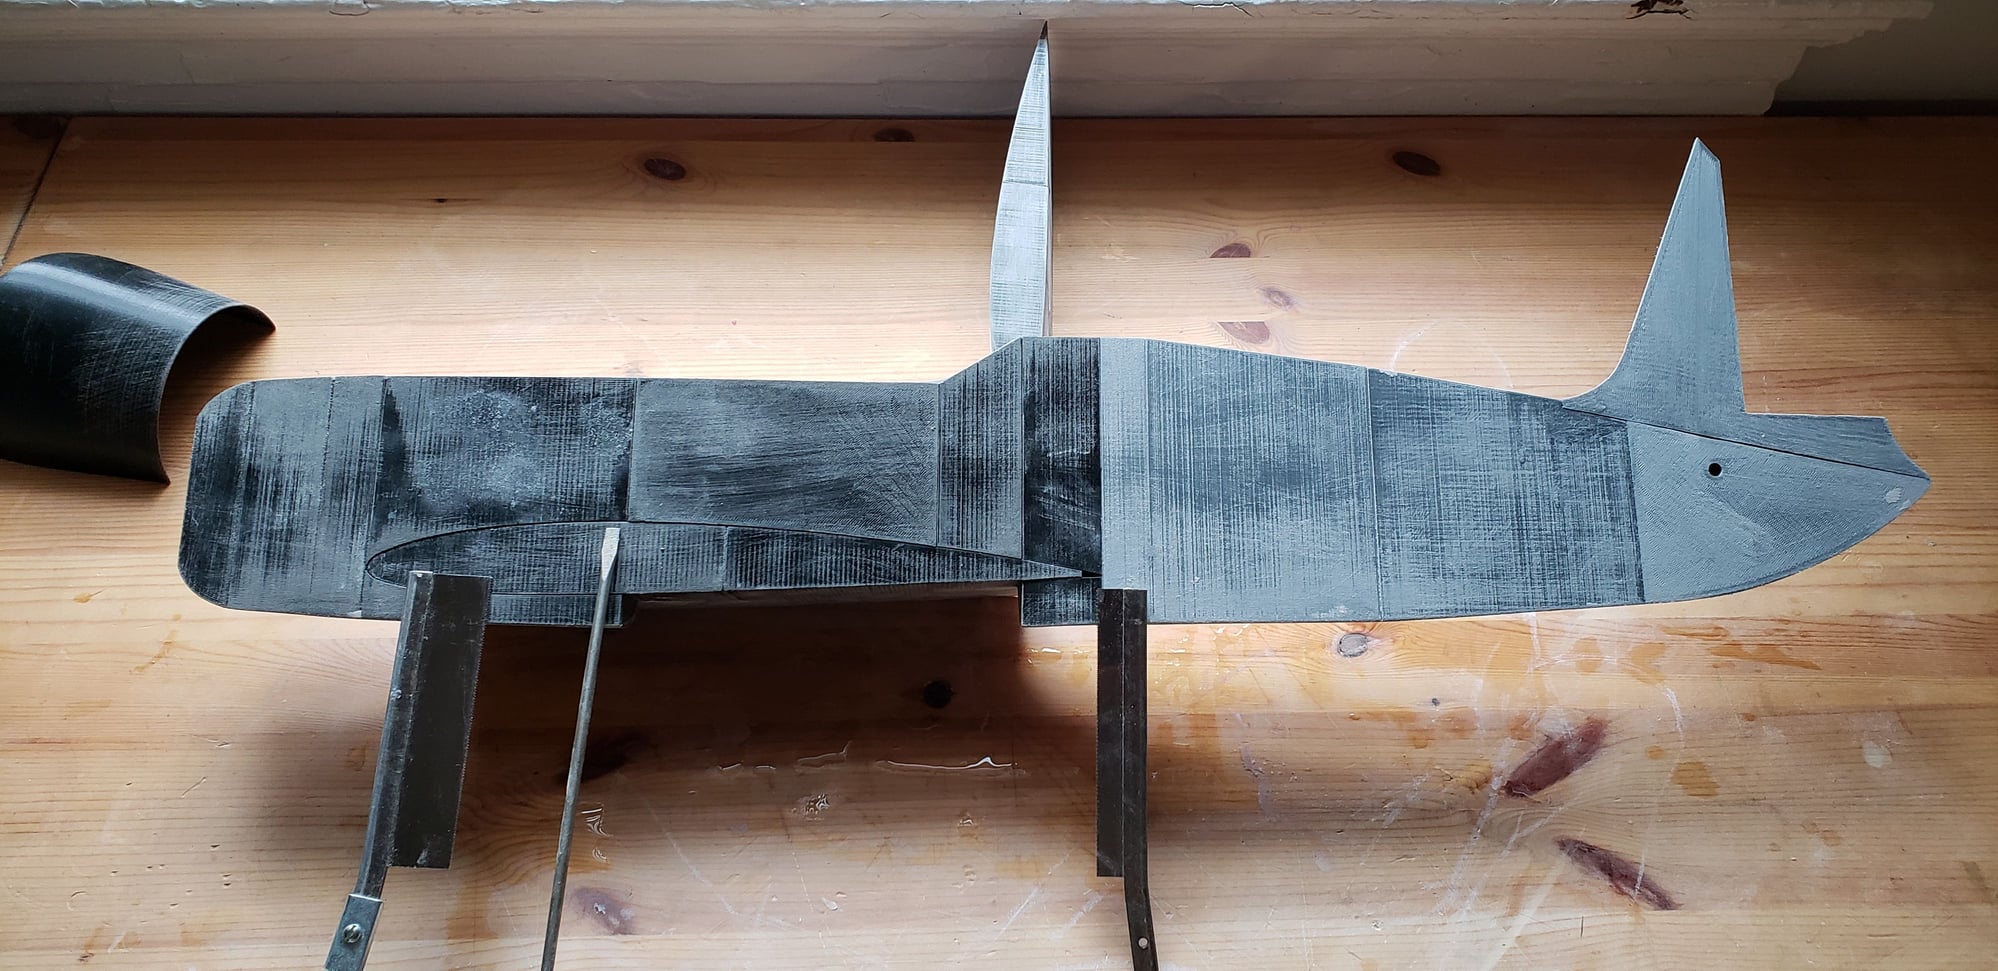
Used a saw to cut the front and backs of the belly pan. The cut outs will make the belly pan mold. Then screwdriver to gently pry the wing blank from the fuselage to get a very precise fitting fillet with the correct dihedral.
Last edited by dirtdart; 10-13-2018 at 06:22 AM.